What is WordPress?
- WordPress is an open-source software which means it is free to use. It’s user friendly, customizable and has a large community, etc.
- It is a content management system (CMS) that allows you to create and manage websites easily.
- It was invented by an American blogger Matt Mullenweg and British blogger Mike Little in the year 2003.
- There are two versions of WordPress:
1)WordPress.com
In this we cannot add our custom domain means it will not be fully registered with your name. WordPress.com will be written automatically on the back of everything. In this everything is free like hosting service and domain.
2)WordPress.org
In this we must attach the domain and hosting service to create a website and to run a website. In this we can create a website professionally because we get a lot of options here. This gives us complete control of the website.
Step-1: Install WordPress
- Here we are using the server as localhost. If we want to install live, then the live is done in the domain.
- To install WordPress, we have to follow the following steps:
1)First install XAMPP
- Go to download XAMPP> there will be some versions of XAMPP you can choose any one of them.
- Then install XAMPP in any device.
- After finishing the installation, the XAMPP Control Panel Screen will open before you.
- Whenever you create a project, you should start Apache and MySQL in the XAMPP Control Panel.
2)After installing XAMPP, create a database in phpMyAdmin.
3)Then install WordPress
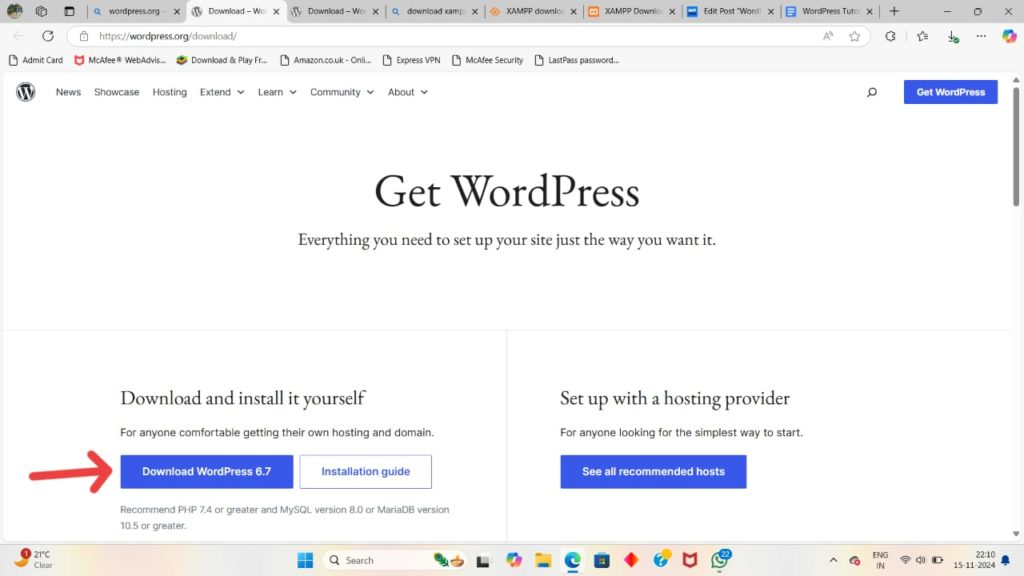
- Go to WordPress.org>Download WordPress

4)Take the WordPress in XAMPP folder
- Go to XAMPP folder>htdocs>WordPress (by copy and paste)>extract the WordPress.
5)To setup the WordPress, search localhost/WP folder name
Continue>let’s go>submit (give database name, username, password)>run the installation (fill according to the information options)>install WordPress>Log in
You will get a link of WordPress dashboard (http://localhost/WP folder name/WordPress/WP-admin/)
Step-2: Familiarize Yourself with the Dashboard
- The WordPress Dashboard is our control center. Here are some key sections:
Posts: Where we create and manage blog posts.
Pages: For static pages like About,Contact,etc.
Media: To upload and manage images and files.
Appearance: Where we can customize our site’s look, including themes and menus.
Plugins: Add functionality to your site.
Setting: Adjust general setting for our website.
Step-3: Choose a Theme
A theme determines the design and layout of our WordPress site. To change the themes:
1.Go to appearance>Themes
2. Click “Add New Themes” for free themes from the WordPress repository.
3. Use the search bar or filters to find a theme that fits your style.
4. You can preview the themes and if you like it, “Install” and then “Active”.
We can change the themes manually also:
Go to WordPress.org or to any place like Theme Forest or Elegant Themes, then download themes. After downloading the themes, copy and paste it within the htdocs>WordPress folder>wpcontent>themes. Then after we can change the themes.
Step-4: Create a Page
- Go to dashboard>page
- It will give two pages like privacy and sample, then it is your choice whether you can keep it or not.
- Then go to Add new page. Add title.
- After creating a page, we must go to menus.
- Menus> menu name> create menu>pages>Add to menu>menu setting>save menu
- Then add content in the page, to create content:
Go to page>All page> edit page>then create content
Step-5: Create a Post
It’s time to create content after setup our site:
- Go to post> Add new
- Enter a title and start writing your content in the editor.
- Add images by clicking on the “Add media” button.
- Assign categories and tags to organize your posts.
- Click “Publish” to make your post shown on our site.
Step-6: What are WordPress Plugins?
- It is used to add new features to your WordPress website. It means that if you want to add new features to your website which are not available in WordPress by default then you can install a plugin to add those features to your site.
How to install a Plugin in WordPress?
- There are two methods to install Plugins in WordPress, such as:
- To install a Plugin, using search from the WordPress dashboard.
- Go to dashboard>Go to plugins
- Add New> Search plugins
- After searching you will get many forms that you want.
- Then choose a form that you like, then click “Install” and then “Activate”.
- Then the plugin will be enabled on your site.
How to use the Plugin?
- Once we install a plugin there are a few common places where we can access or control its setting.
- The first page is from this place.
- Here you can see that we have the “setting” option under the plugin name.
- By clicking on the setting option, we can change the plugin features, and we can create new contact forms.
- The other place where a new plugin can appear is on the site bar, so here you can see that, once we install the plugin, we get a new item form that you have chosen before.
- Then clicking that form we can access all the features of the plugin.
- If you are still not able to access it, you can check it by going to view details and after clicking on view details we can find the details about the plugin and how you can use it.
- Now every plugin in WordPress has different features and will work differently.
For example: If you click on add new option of any form it will add a new button like this Edit with Character which is used to build the page using the plugin.
- Uploading the Plugin .zip file.
- It is done when you have downloaded a plugin in zip format or when you buy a premium plugin, you will get the plugin as a zip. File.
- Now in order to install this plugin on the WordPress site, you need to upload this file to WordPress.
To upload this Plugin
- Go to WordPress dashboard>Go to plugin.
- Add New Plugin>Upload plugin.
- Now choose the file to select your plugin and then select your plugin zip. File.
- After the plugin has been selected then “Install Now” and then “Activate Plugin”.
Conclusion:
In conclusion, we have gained the foundational skills to create and manage our WordPress site.
