Adding Facebook login to your Elementor site with Happy Social Login is a great way to let your visitors log in with ease. In this guide, I’ll walk you through setting up Facebook as a login provider using Happy Social Login. Follow these steps to make logging in with Facebook a breeze for your users!
Important: Business Verification Requirement #
As of February 1, 2023, Facebook requires Business Verification for Advanced Access, which is necessary for the Facebook login feature. This means only verified businesses can use Facebook login. For more information, refer to Facebook’s official statement.
Step 1: Create a Facebook App #
To enable Facebook login on your Elementor site, you need to create a Facebook app. Here’s how:
- Go to Facebook Developers: Visit https://developers.facebook.com/apps/.
- Log in with Your Facebook Credentials: If you aren’t already logged in, log in with your Facebook account.
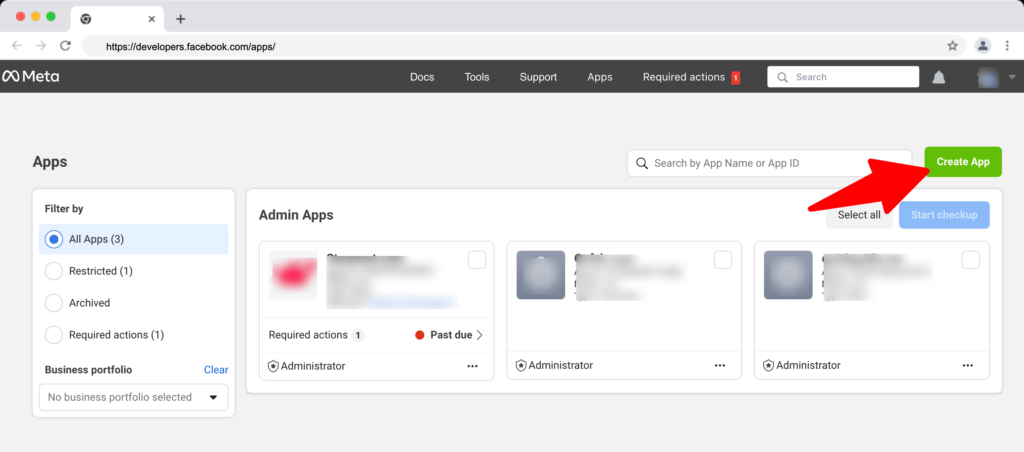
- Create a New App: Click on the “Create App” button as shown in the image below.
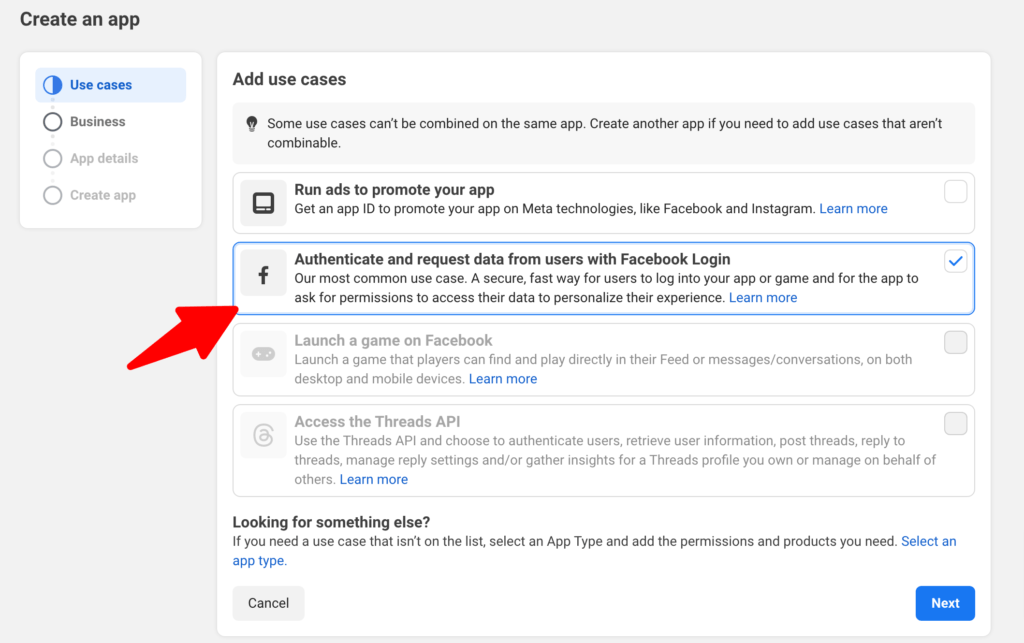
3. Select App use cases: Click Next and choose the “Authenticate and request data from users with Facebook Login” option.
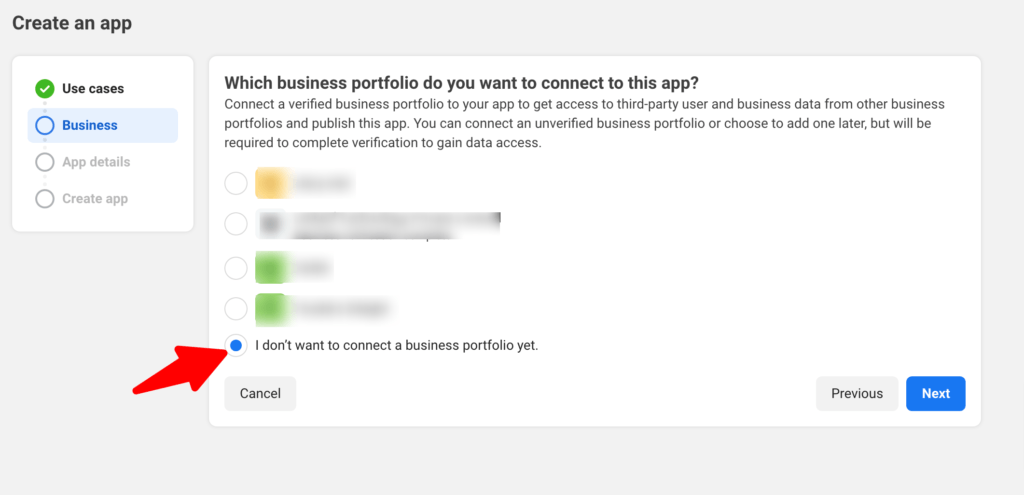
4. Select a Business Portfolio: If you have a business portfolio in facebook choose that otherwise select “I don’t want to connect a business portfolio yet”
5. App Name and Contact Email: Fill in the App name and App contact email fields. The app name will appear on the consent screen shown to your users.
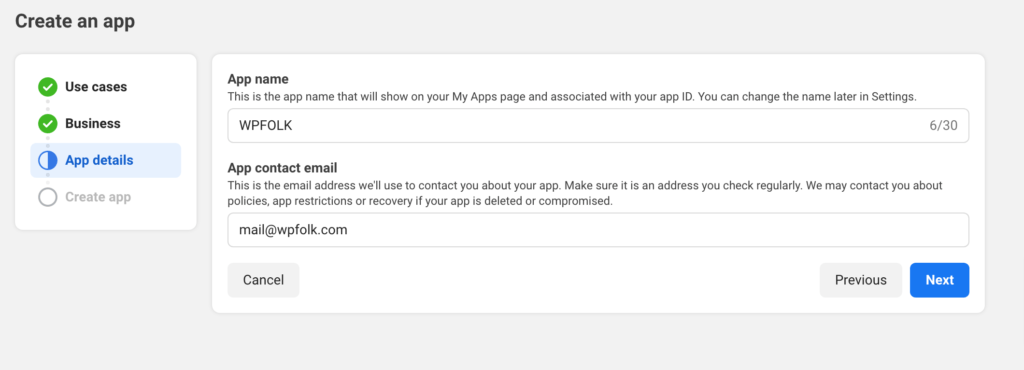
6. Finalize: Click on Next, review the terms, and then select Go to Dashboard. If prompted for your facebook password, then enter it and proceed.
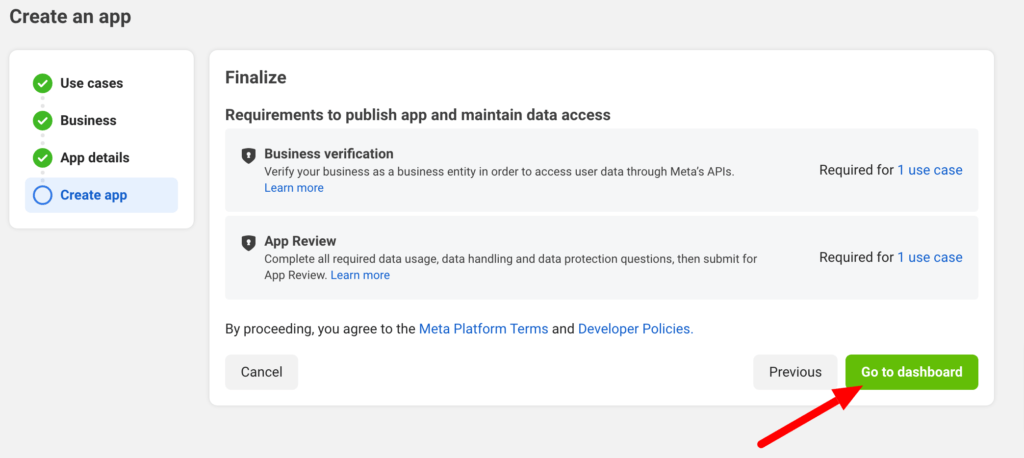
Step 2: Configure App Settings for Facebook Login #
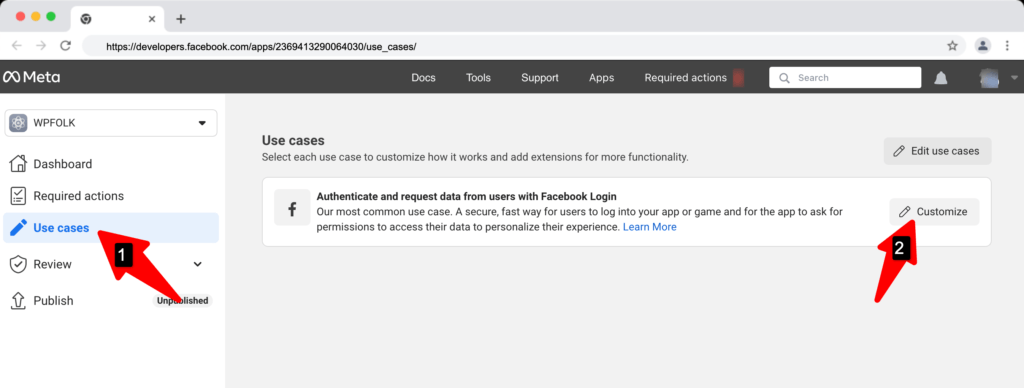
1. Customize Facebook Login: Go to Use Cases on the left menu, and click Customize next to Authenticate and request data from users with Facebook Login.
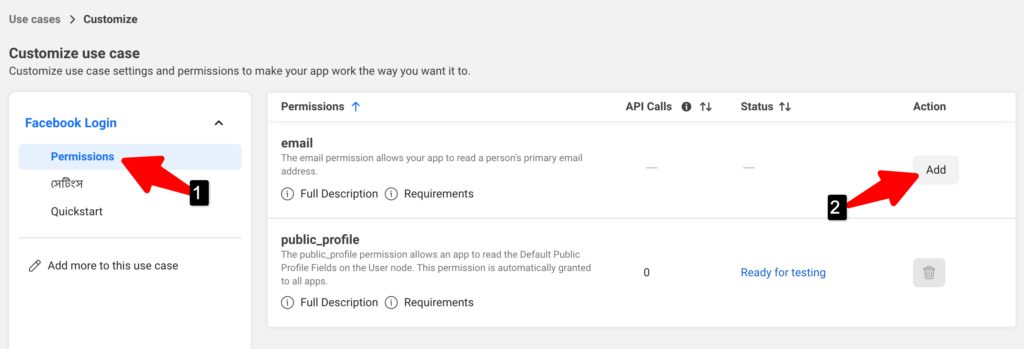
2. Under Permissions, find the email permission and click Add.
3. Facebook Login Settings:
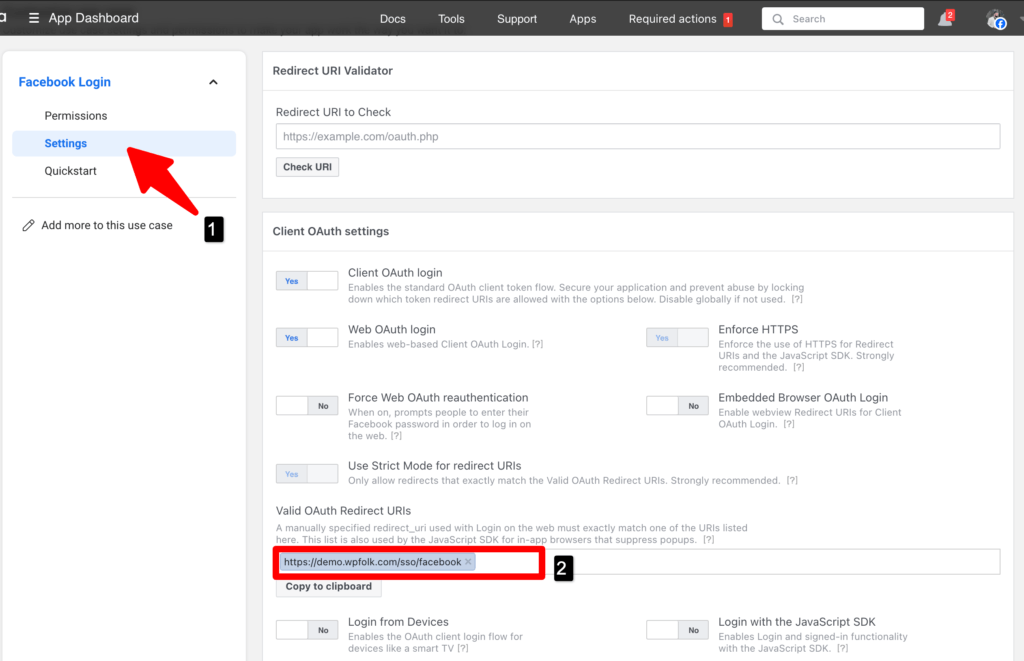
- Go to Facebook Login > Settings on the left.
- In the Valid OAuth Redirect URIs field, add your callback URL:
https://yoursite.com/sso/facebook(replace “yoursite.com” with your actual domain). - Click Save changes. If the page goes blank, refresh it.
4. App Basic Settings
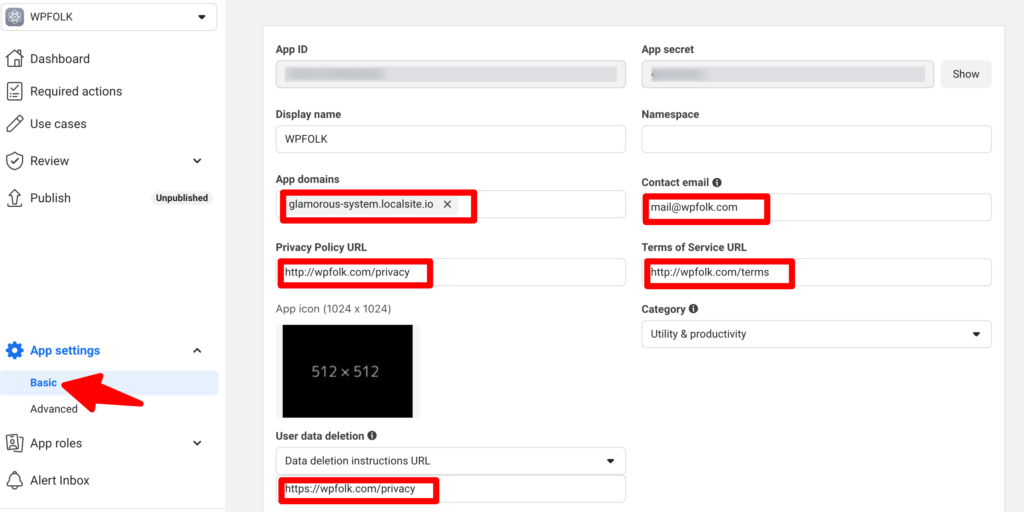
- In the sidebar, click on Settings > Basic.
- Add your domain name in the App Domains field.
- Fill out the Privacy Policy URL and Terms of Service URL fields with links to these pages on your site.
- Under User Data Deletion, select Data Deletion Instructions URL and provide a link to a page that describes how users can delete their accounts. This is required for GDPR compliance.
- Select an App Icon and Category.
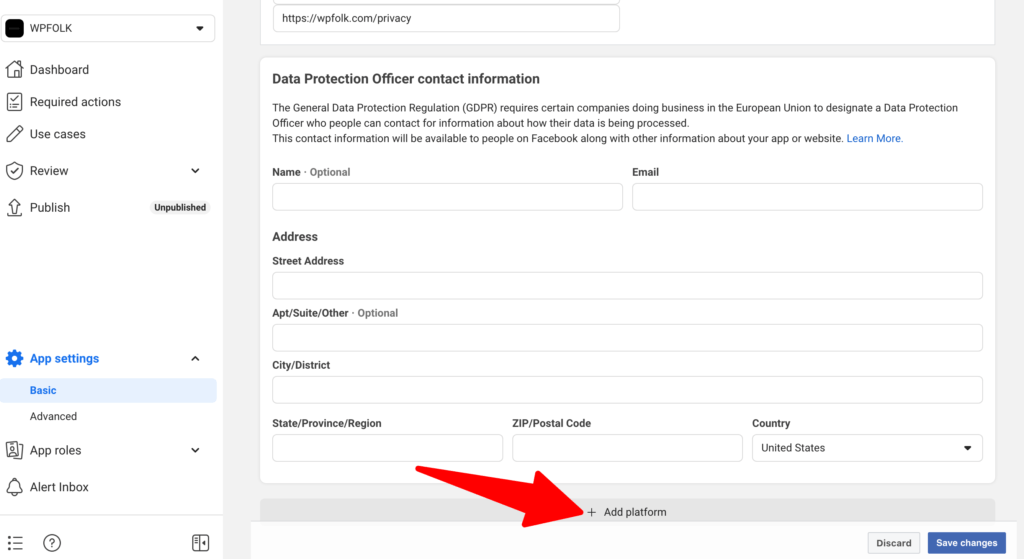
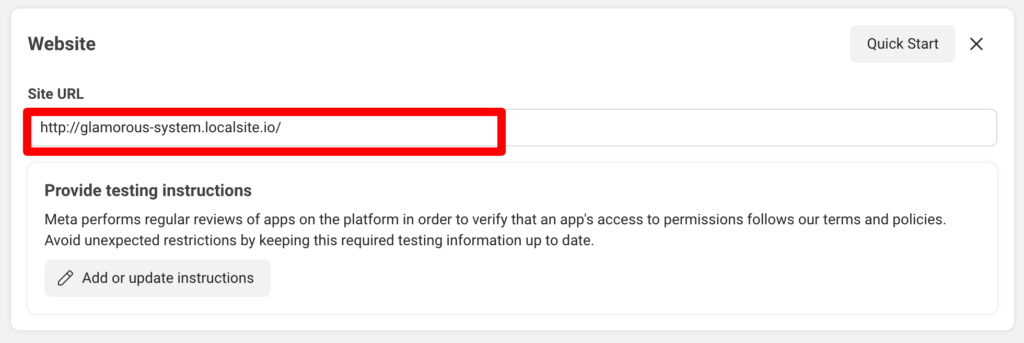
5. Scroll to the bottom, click + Add Platform, select Website, and enter your site URL in the Site URL field.
6. Add your website url and click on save changes
7. Advanced Access & Business Verification:
- By default, Facebook apps only have Standard Access to permissions like
public_profileandemail, which restricts usage to developers. - To allow your app for public use, navigate to Review > Verification in the sidebar and start the Business Verification process.
- After successful verification, go to Review > App Review and complete any necessary fields, then submit for review.
- Once approved, publish your app by going to the Publish tab and selecting Go to data handling questions to answer questions about data usage.
- Change the app mode from Development to Live by clicking the Publish button.
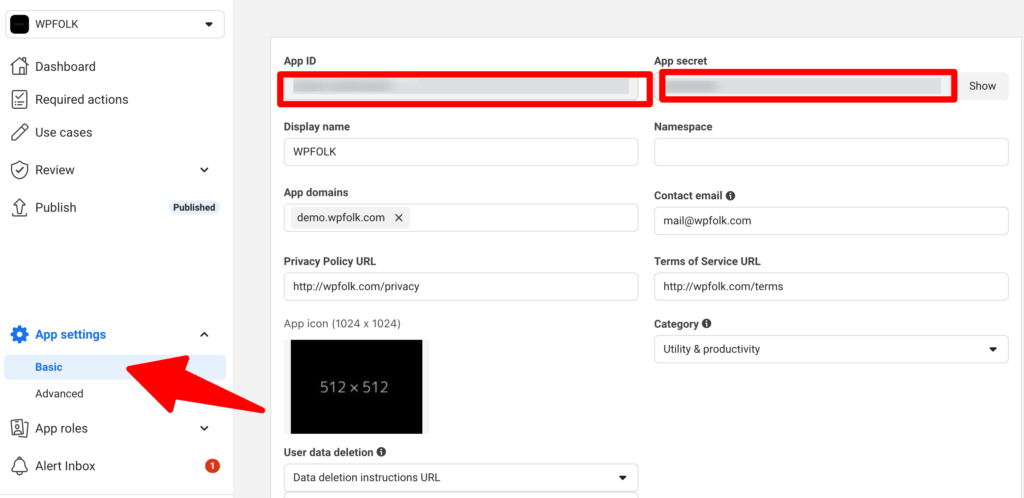
8. Obtain App ID and App Secret:
- Go to Settings > Basic in the left menu.
- Copy your App ID and App Secret (click Show to reveal the secret). You’ll need these for the next steps.
Step 3: Configure Facebook Settings in Happy Social Login #
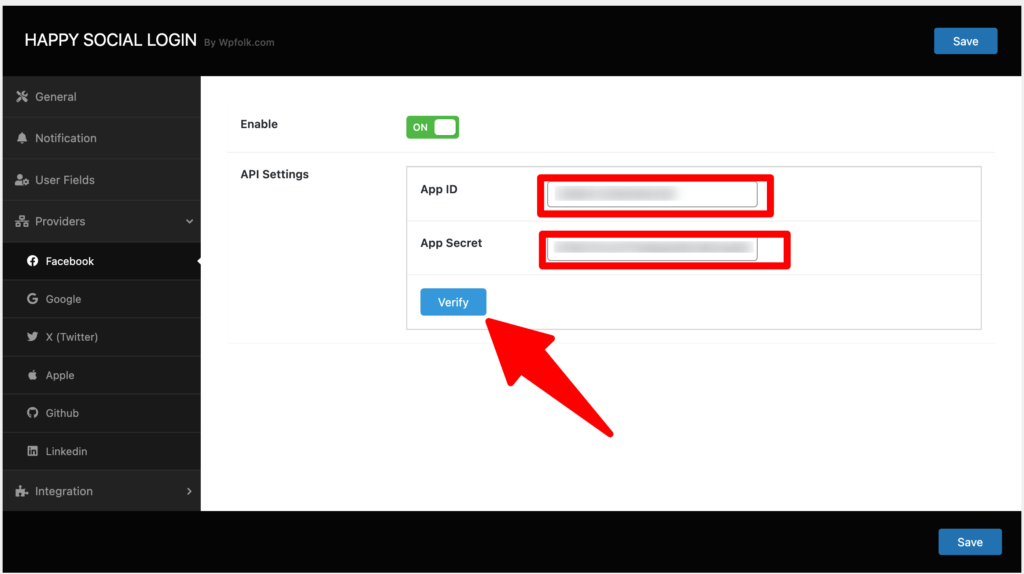
- Go to Happy Social Login > Settings > Providers > Facebook in your WordPress dashboard.
- Enable Facebook as a provider.
- Paste your App ID and App Secret into the corresponding fields.
- Click Verify to confirm the setup. Once verified, Happy Social Login will display a success message confirming that Facebook login is configured correctly.
Step 4: Enable Elementor Integration #
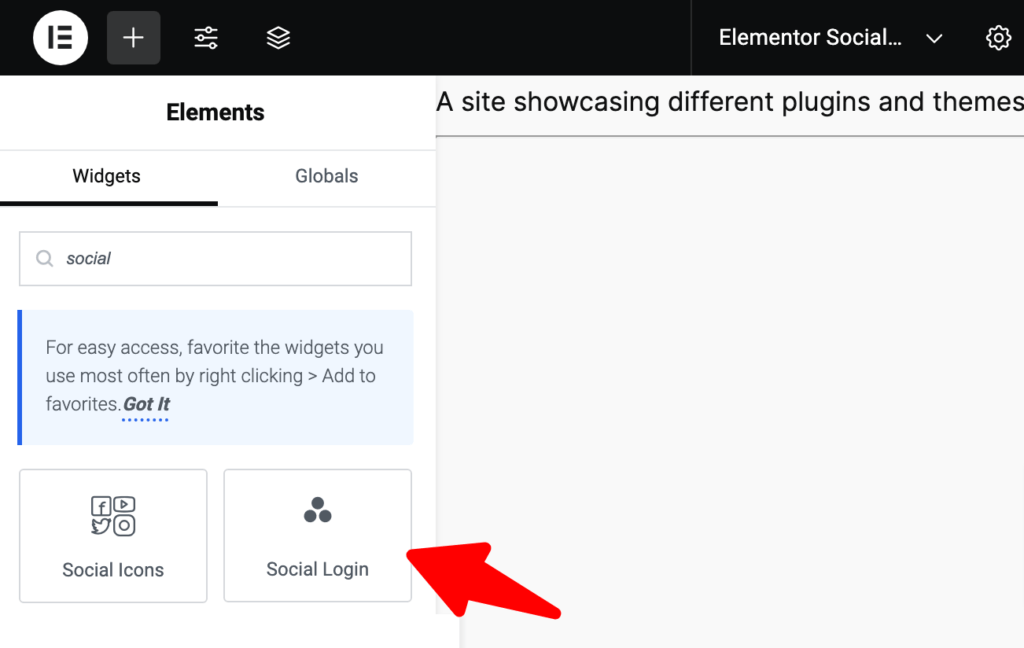
- Go to Happy Social Login > Integrations and enable Elementor Integration.
- In the Elementor editor, you’ll now see the Social Login widget.
Step 5: Add Facebook Login to Your Login Page #
- Create a new page in Elementor for your login (e.g.,
yoursite.com/login). - In Elementor, search for the Social Login widget.
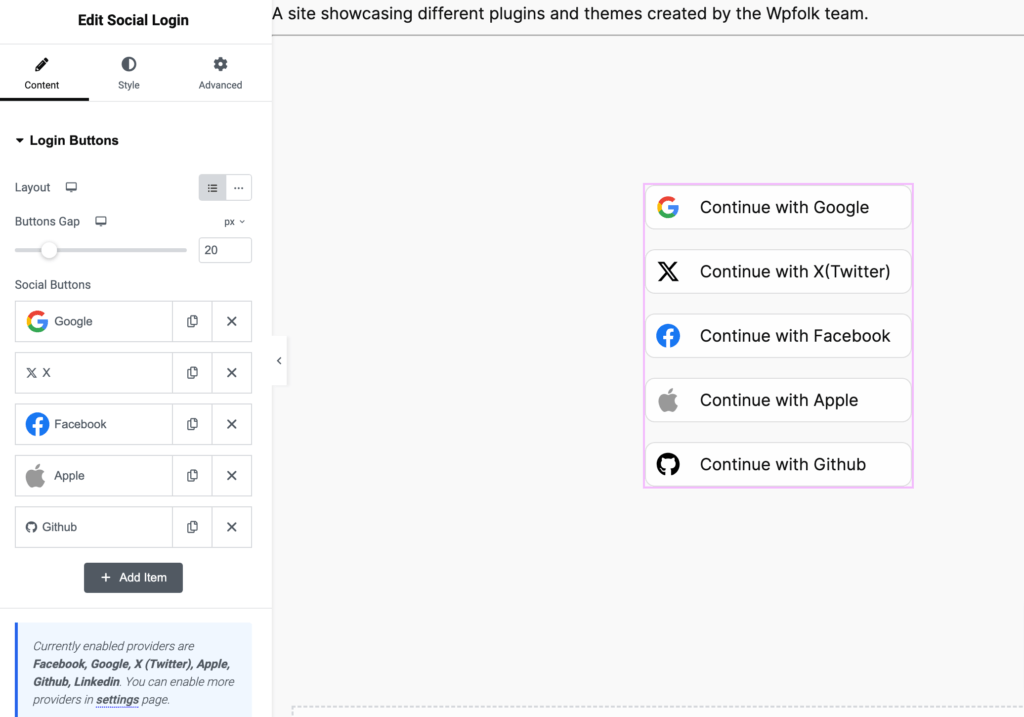
- Drag the Social Login widget into your page, and you’ll see the Facebook login option along with any other providers you’ve enabled.
Step 6: Test Your Facebook Login #
To ensure everything is working:
- Log out of your WordPress account or open an incognito browser window.
- Visit your login page and click the Continue with Facebook button.
- You’ll be redirected to the Facebook login screen. Once you log in, you’ll be redirected back to your site.
- A new user will be automatically created in WordPress if the login is successful.
Conclusion #
By adding Facebook login to your Elementor site using Happy Social Login, you’re making it easy for users to access your content quickly. Following these steps, you can enable Facebook login, improve user experience, and keep your site secure. Remember, if you want to add other social login providers like Google, the steps are quite similar—just make sure to configure the provider’s API settings in Happy Social Login.
This setup not only simplifies login for your users but also boosts engagement, as they no longer need to create a new account just to log in. It’s a win-win for you and your audience!
